Custom Columns & Custom Queues (Admin)
What is a Custom Queue?
A custom queue is a view of tickets based on a custom criteria that you specify. It allows you to create your own personal views of tickets and specify what information you would like to see.
What is a Custom Column?
A custom column is an additional field that is not displayed initially when viewing the ticket tab. Using custom columns allows you to include these fields in the ticket list.
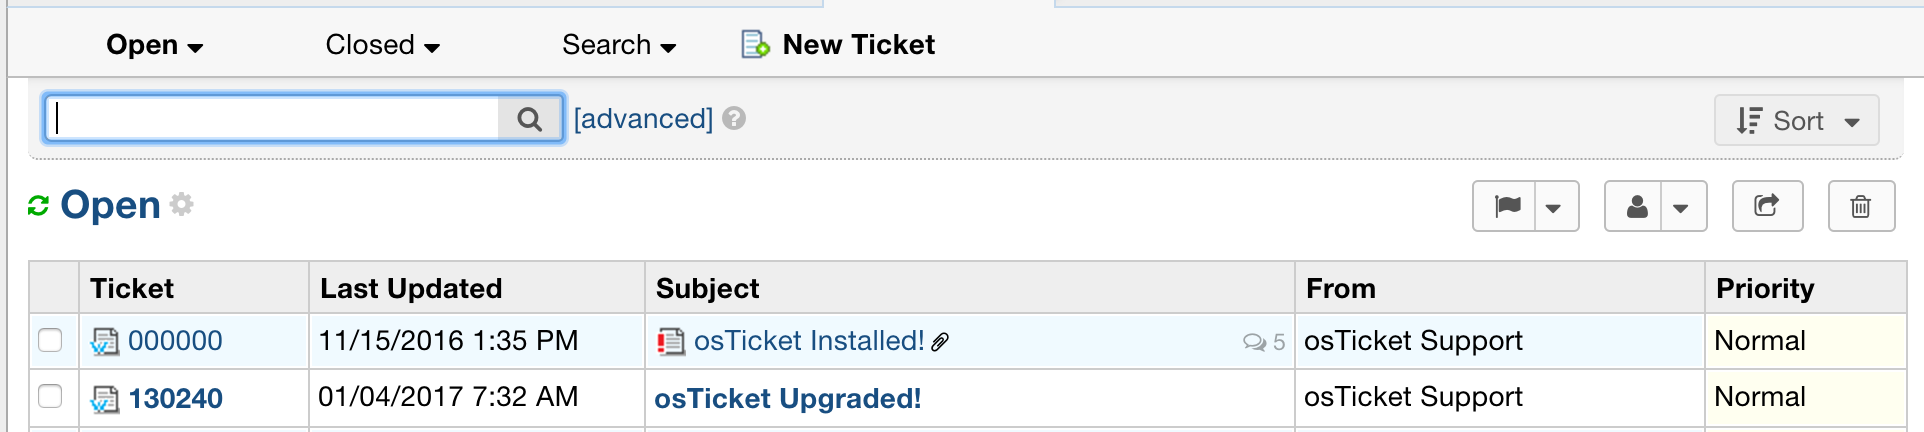
Before adding custom columns:
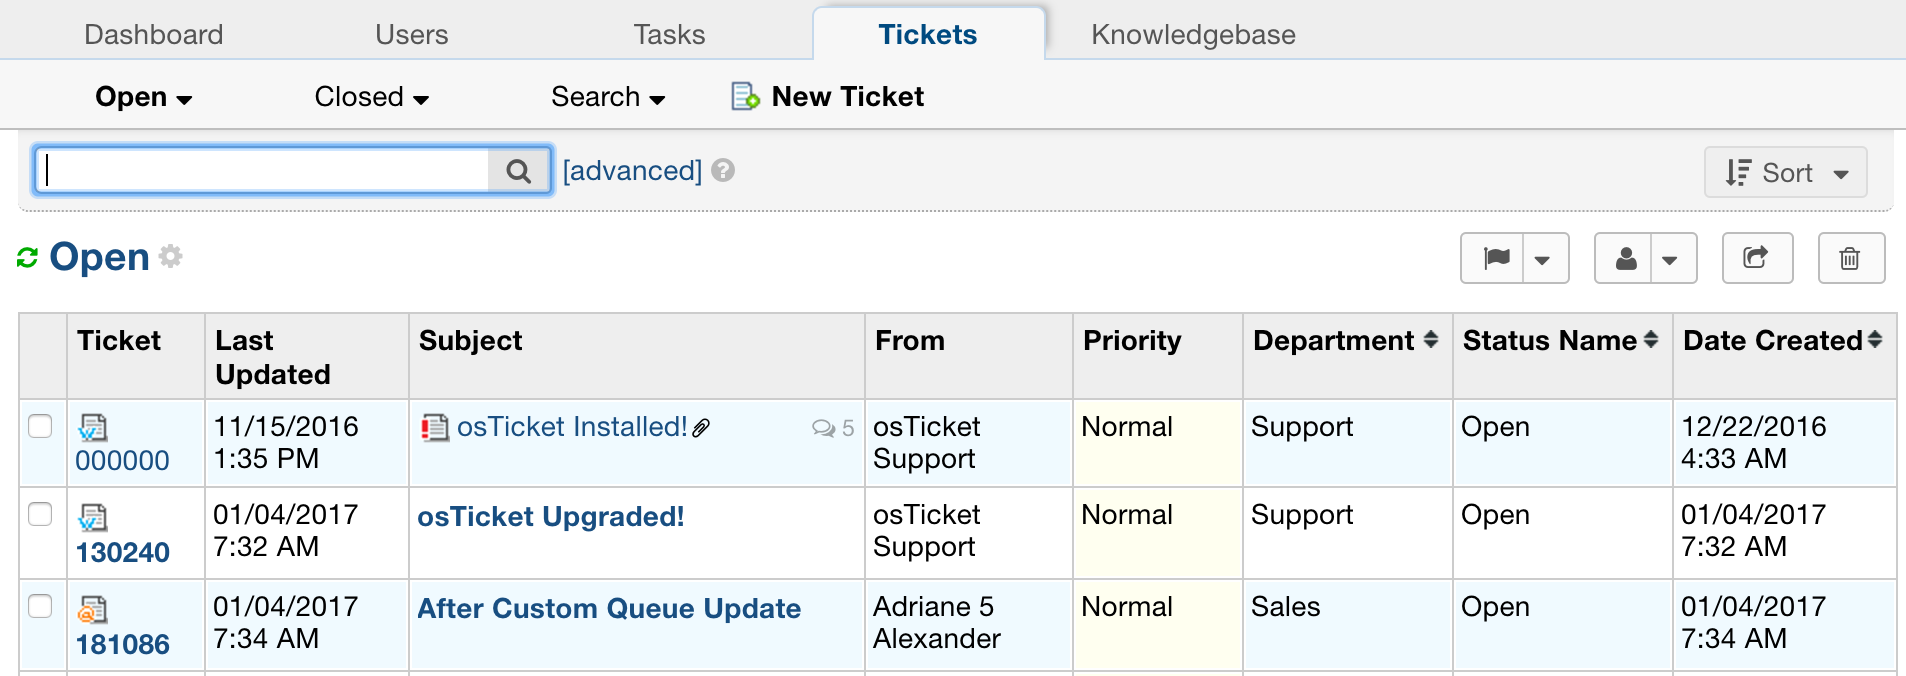
After adding custom columns:
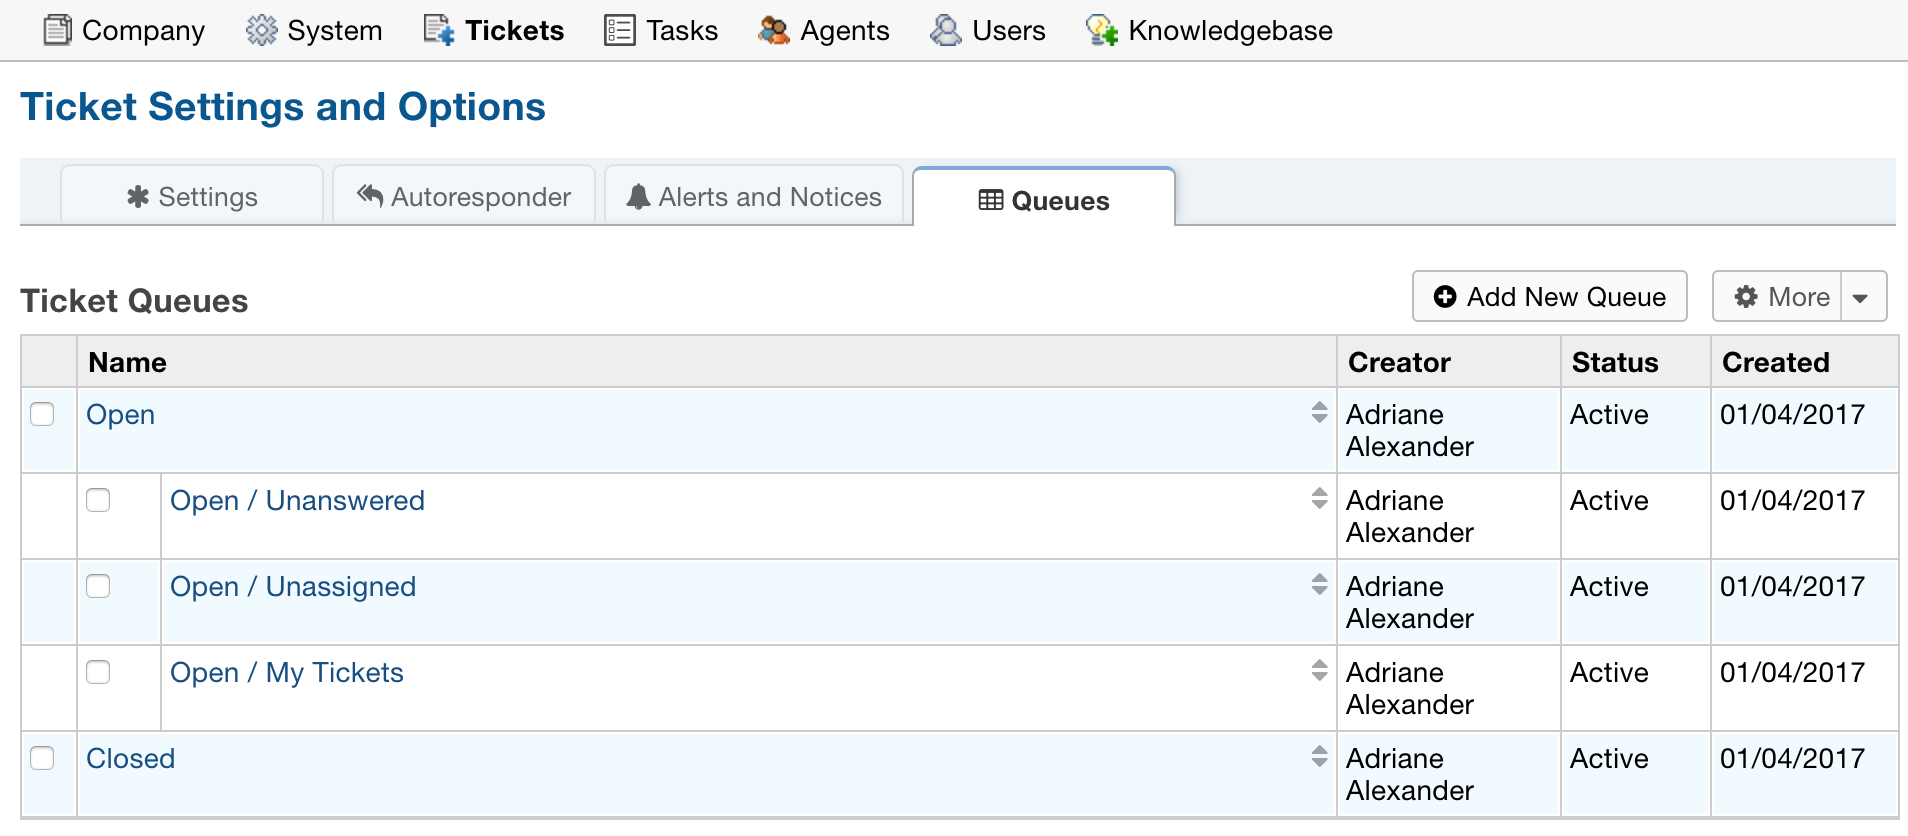
How can I add a global queue that everyone can see?
Admin Panel | Settings Tab | Tickets | Queues Tab | Add New Queue

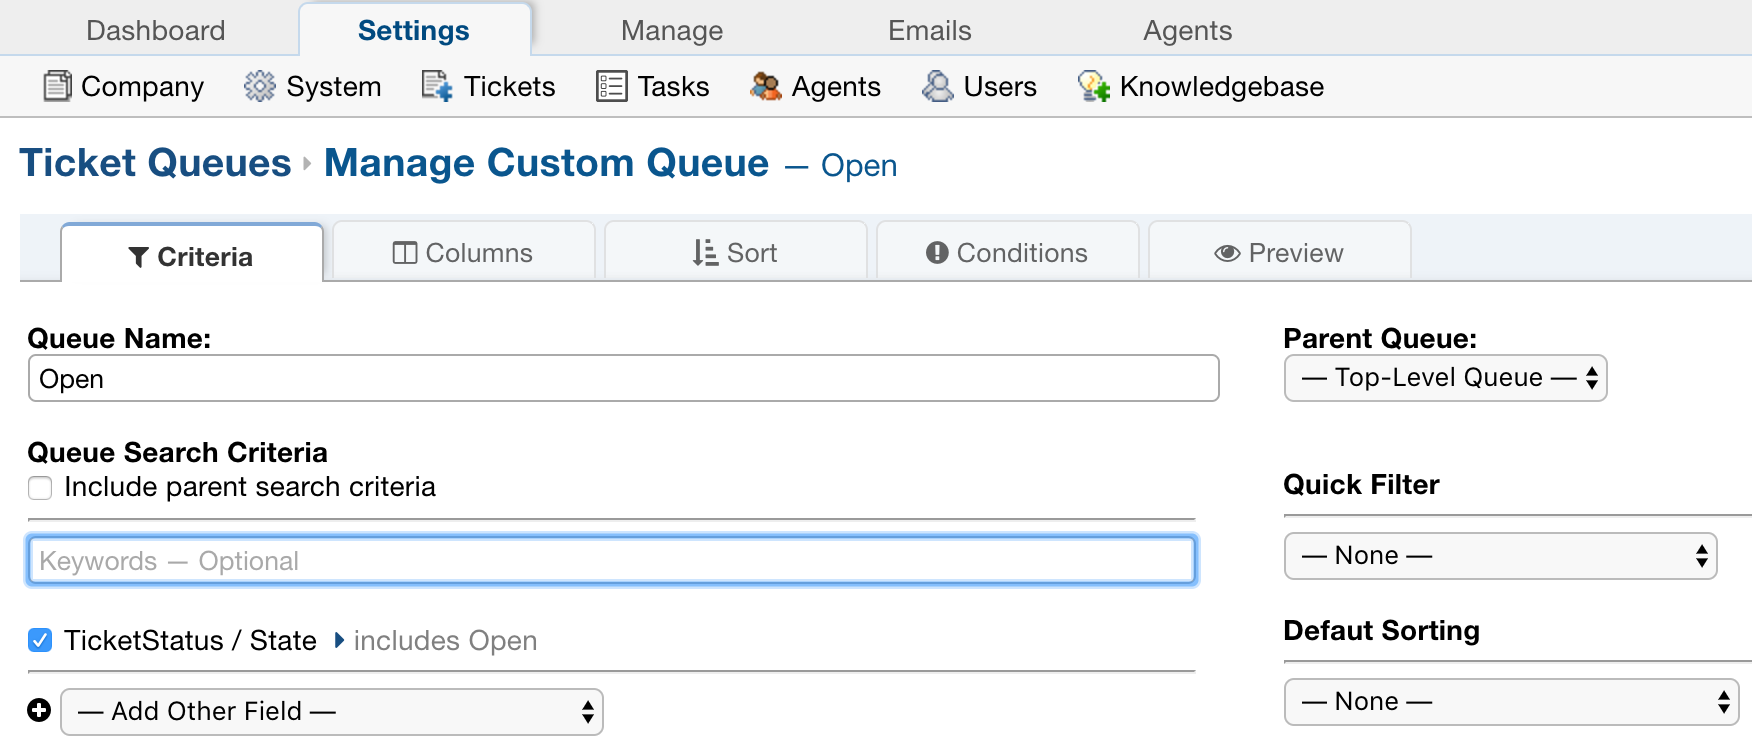
From here, you can configure the new queue by selecting the criteria of tickets for the queue:
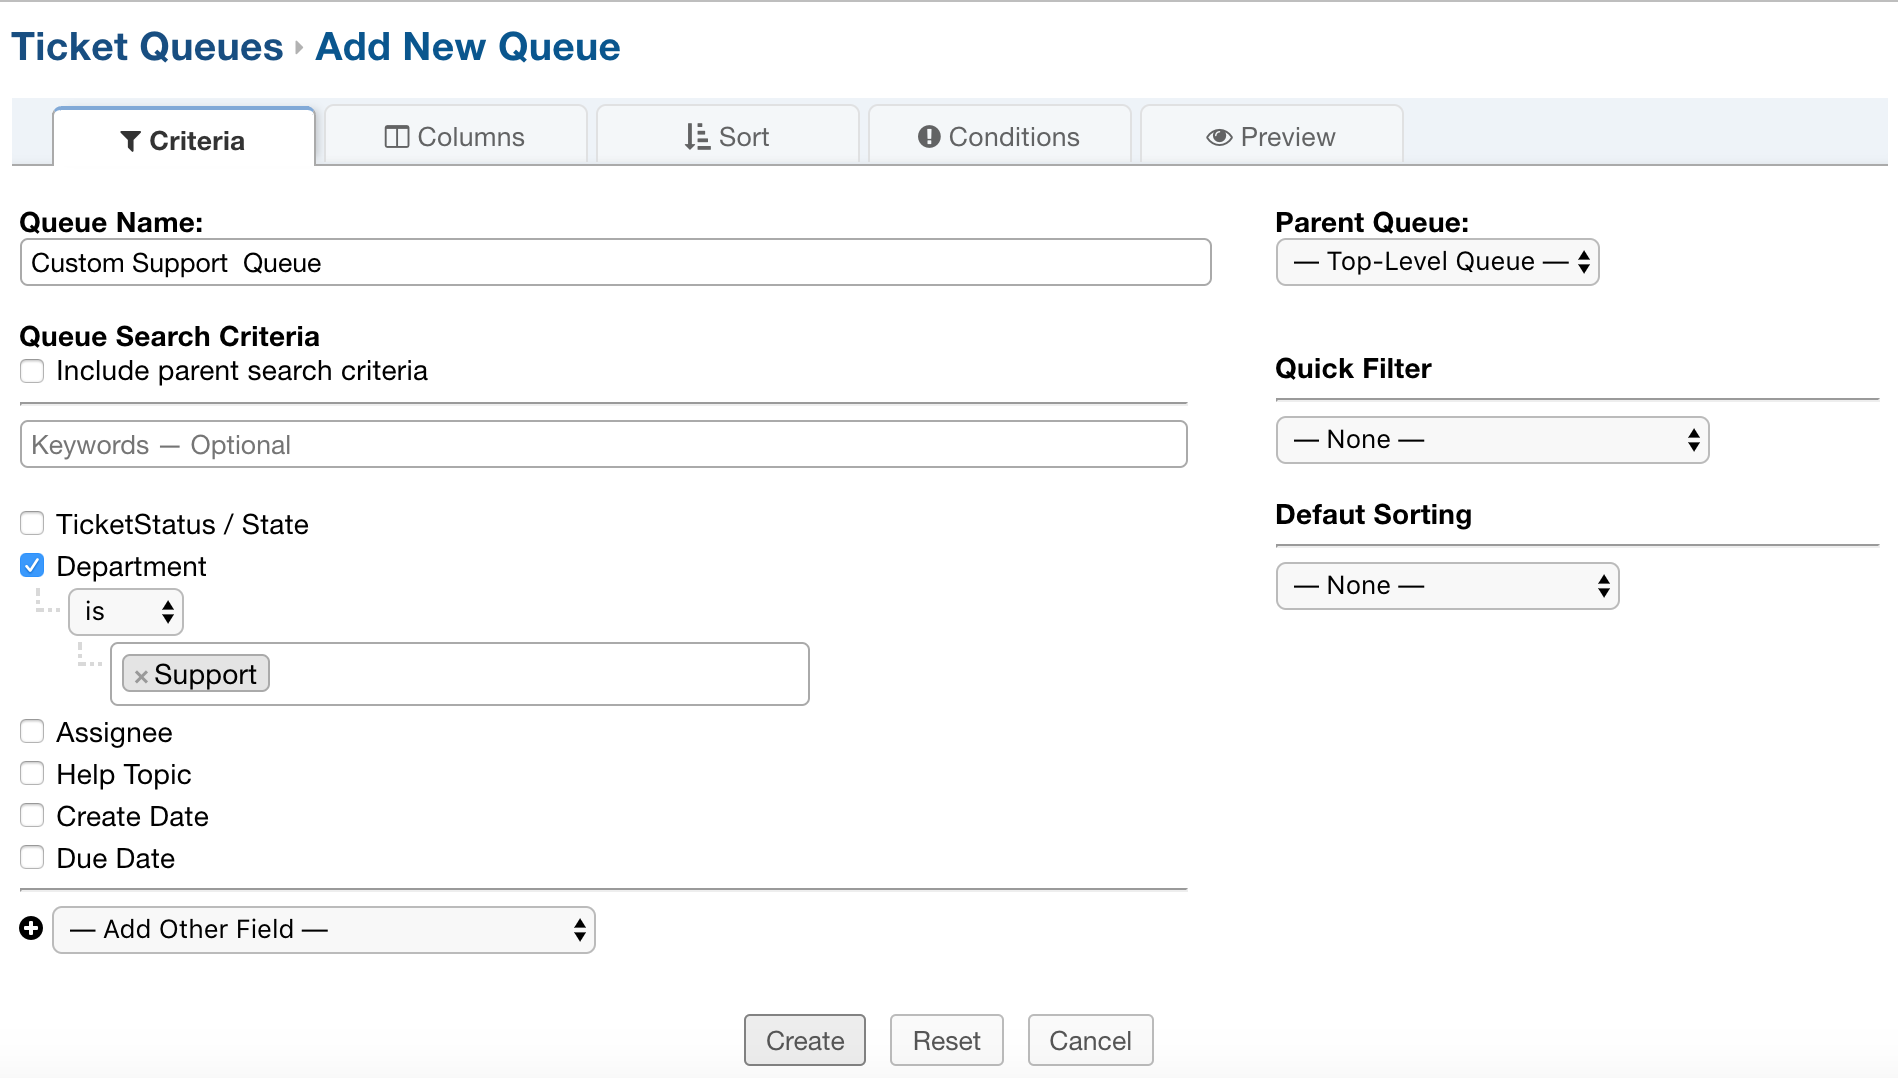
For this example, I chose to create a queue for the Support Department.
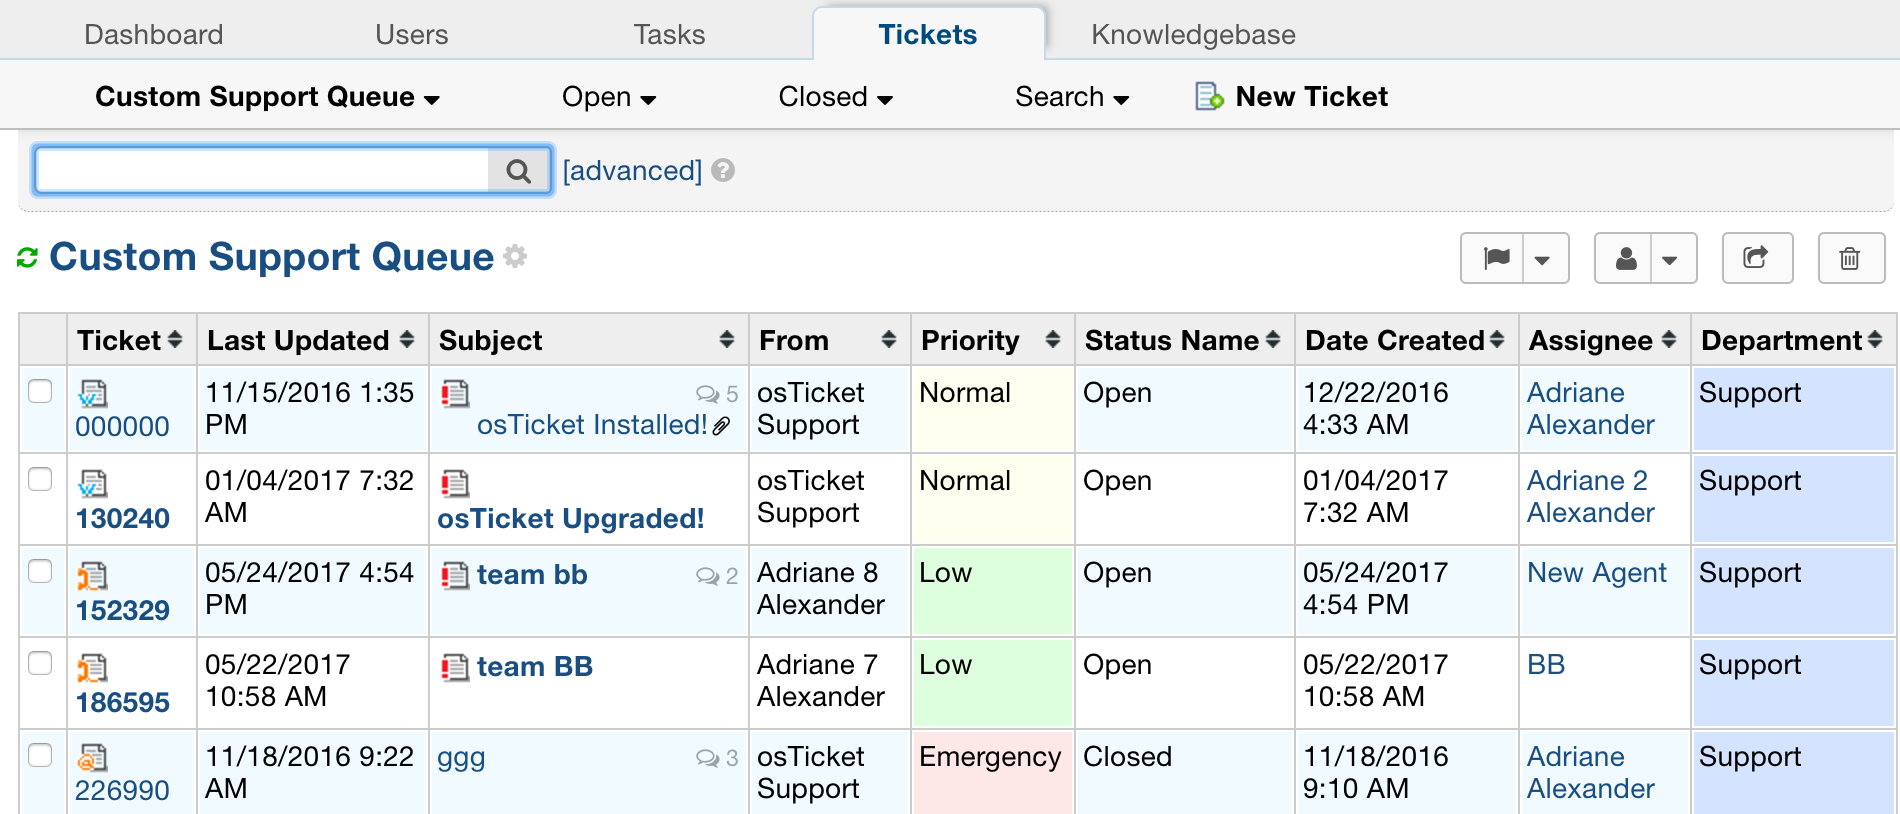
Once the queue is created:
How do I add more columns to a queue?
Admin Panel | Settings | Tickets | Queues
From there, you will need to select the queue you want to add columns to. In this example, I will select the Open queue.
Next, you should select the ‘Columns’ tab.
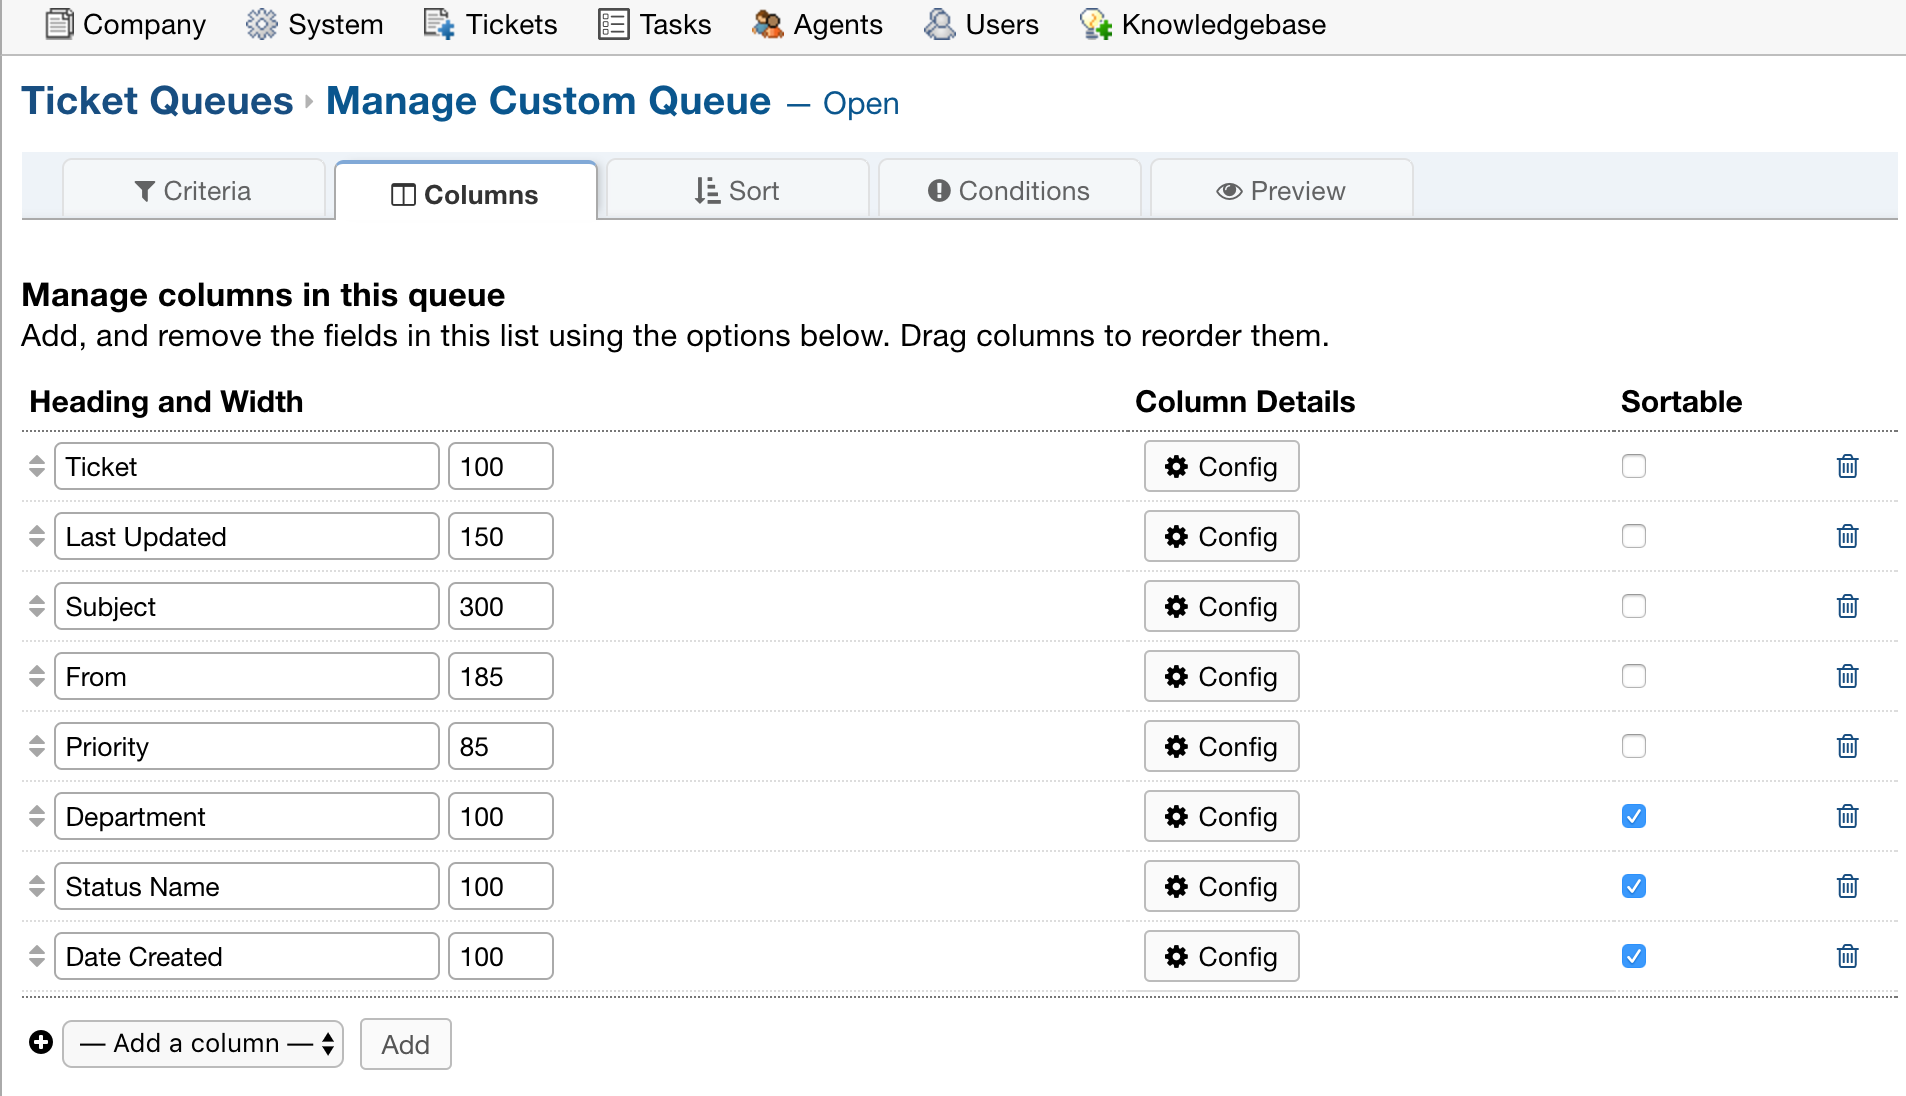
Within the ‘Columns’ tab, you can select fields to be added as columns, edit the order in which fields show up by dragging the rows, and choose which fields should have the option to be sorted.
Additionally, clicking the ‘Config’ button beside a field allows you to:
- Determine how ticket data is displayed
For example, what is shown when hovering over a link or what format dates display as.
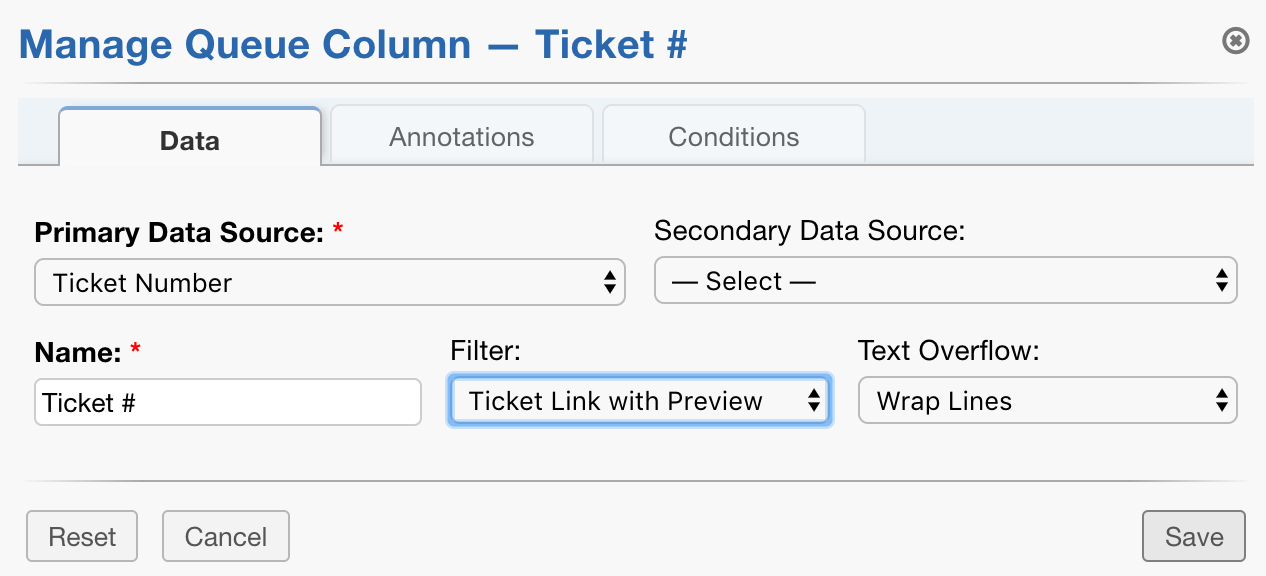
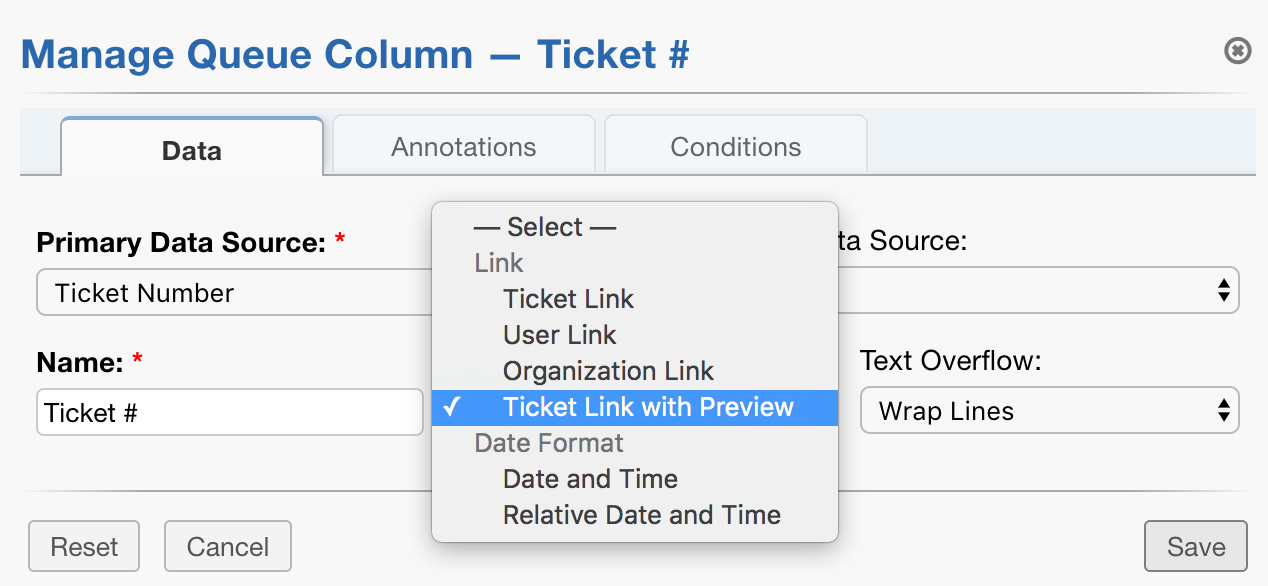
Note: Primary and Secondary Data Source refer to the field’s data that will show up in a column. Secondary Data Source allows you to choose an alternative field’s data to display if the Primary Data Source is not populated.
- Add an annotation to show up beside specified fields
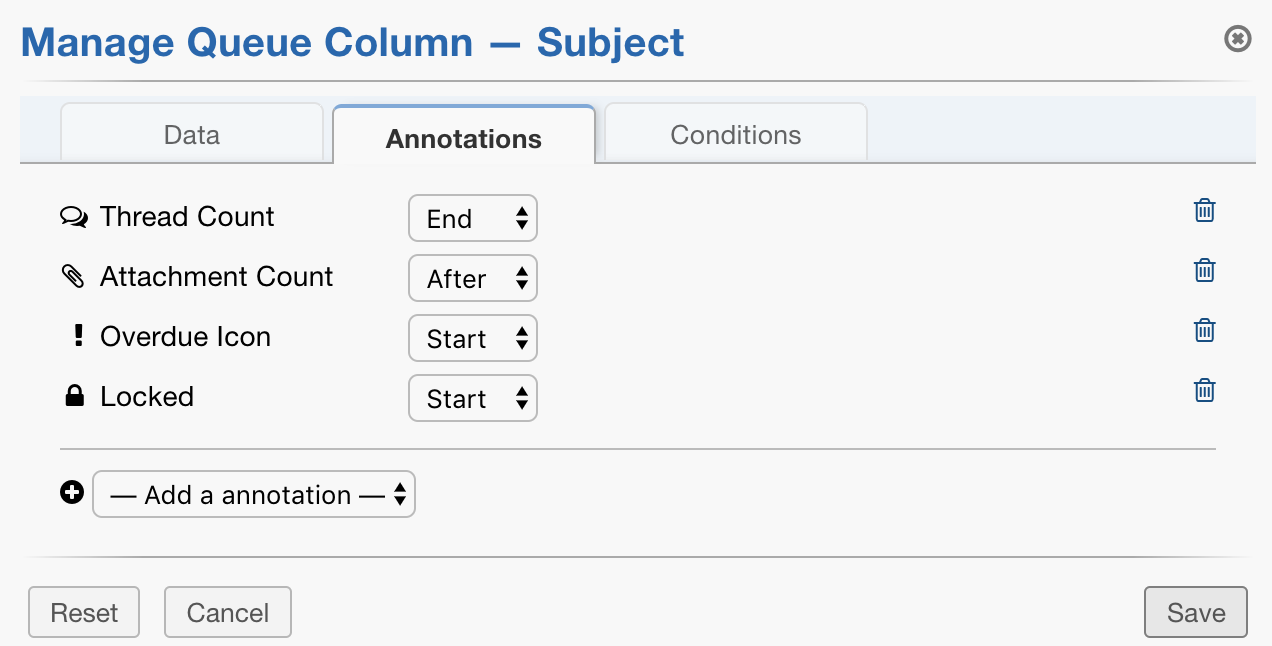
An annotation is a small icon that represents more information about a field. For example, the annotation for thread count displays as a chat icon with the number of responses included on a ticket

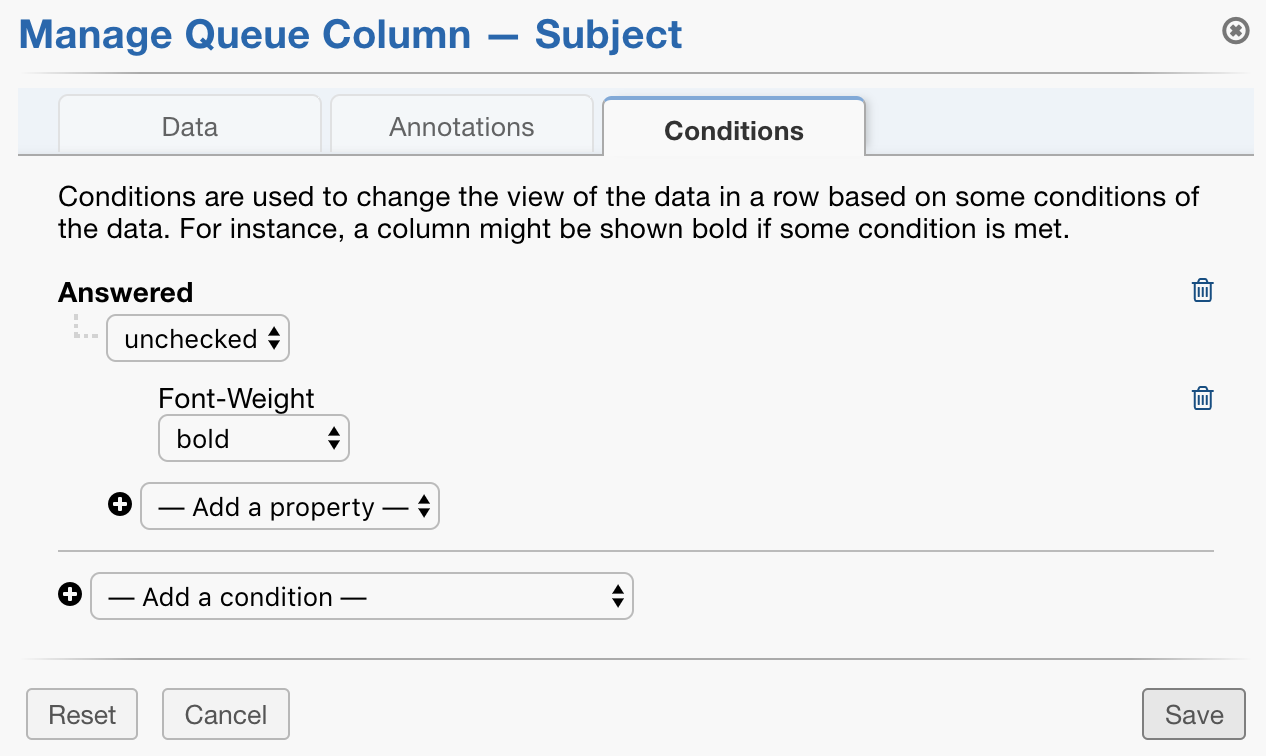
- Add (or modify) conditional styling
Add
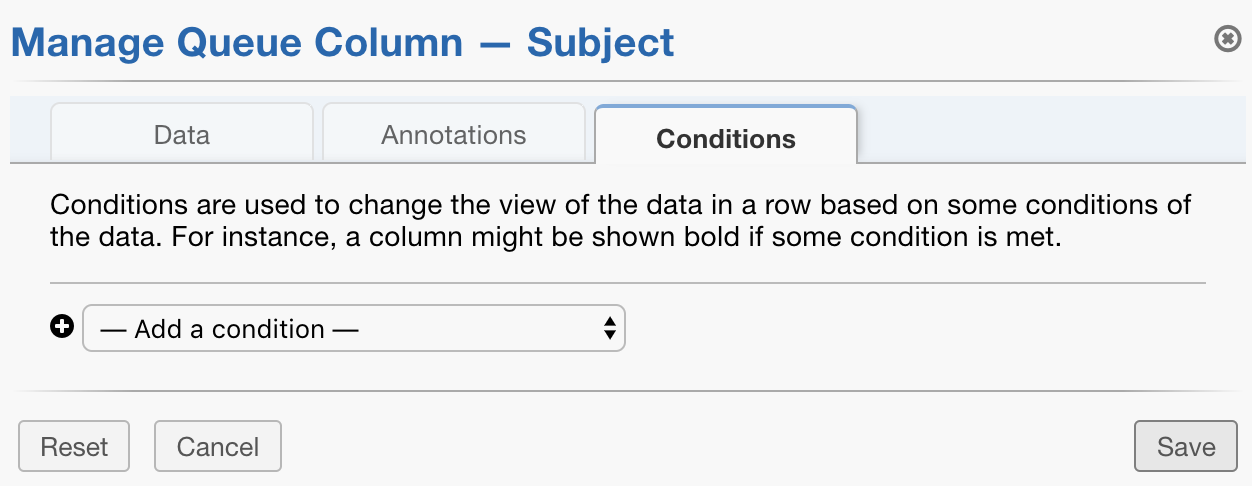
Modify
Do custom queues support conditional styling?
There is a feature to add style to queues. These settings can be found by going to: Admin Panel | Settings | Tickets | Queues
From there, you will need to select the queue you want to add conditional styling to. In this example, I will select the Open queue.
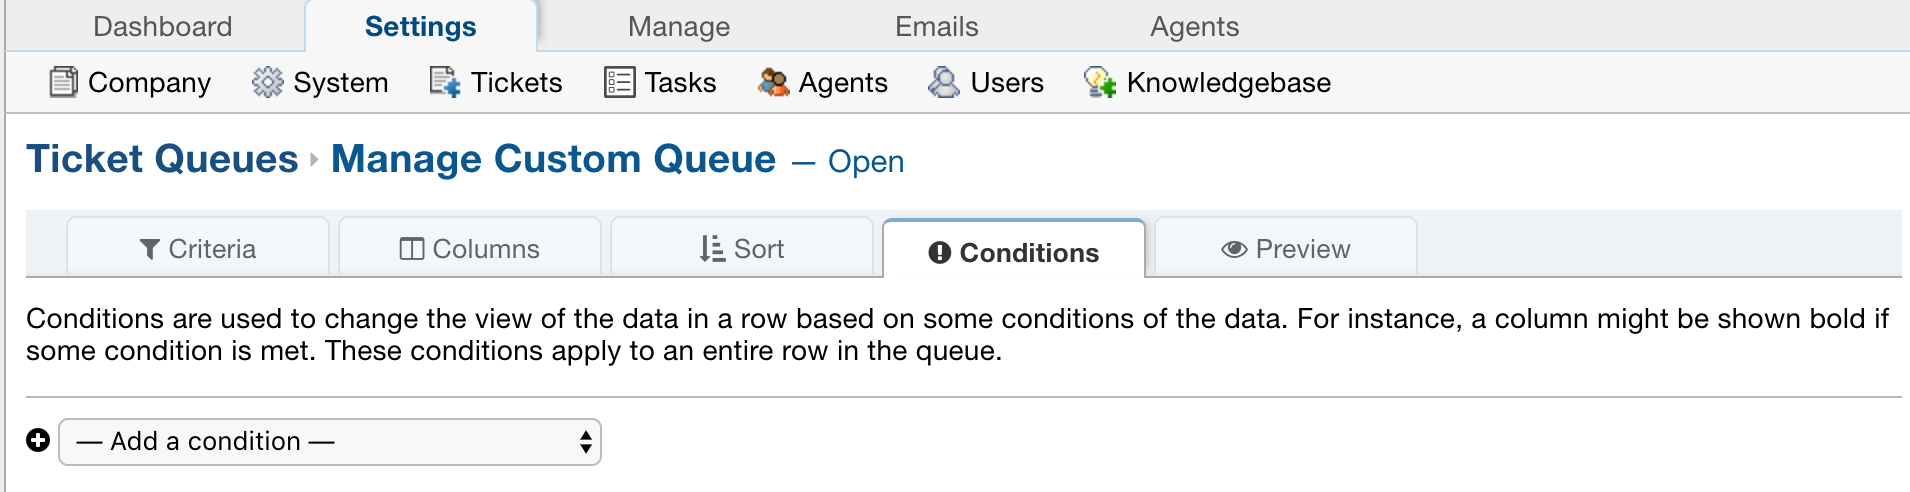
Once you select a queue, you should select the ‘Conditions’ tab where you are able to specify what styling you want and under which criteria. Many options are included to manipulate the color, font style, and text of ticket records.
Before Adding Conditions:
After adding conditions:

Once you save a style, you can click the preview tab to see how it looks.

Adding conditions this way will apply the style to the whole row, as shown above.
If you decide that you want to discard the styling, you can do so by clicking the trash can beside the style.
Additionally, you can add conditional styling to only one field specified. To do this, select the Columns tab within the queue you are adding style to.
Click the ‘Config’ button for the column to add style to it and then select the ‘Conditions’ tab.
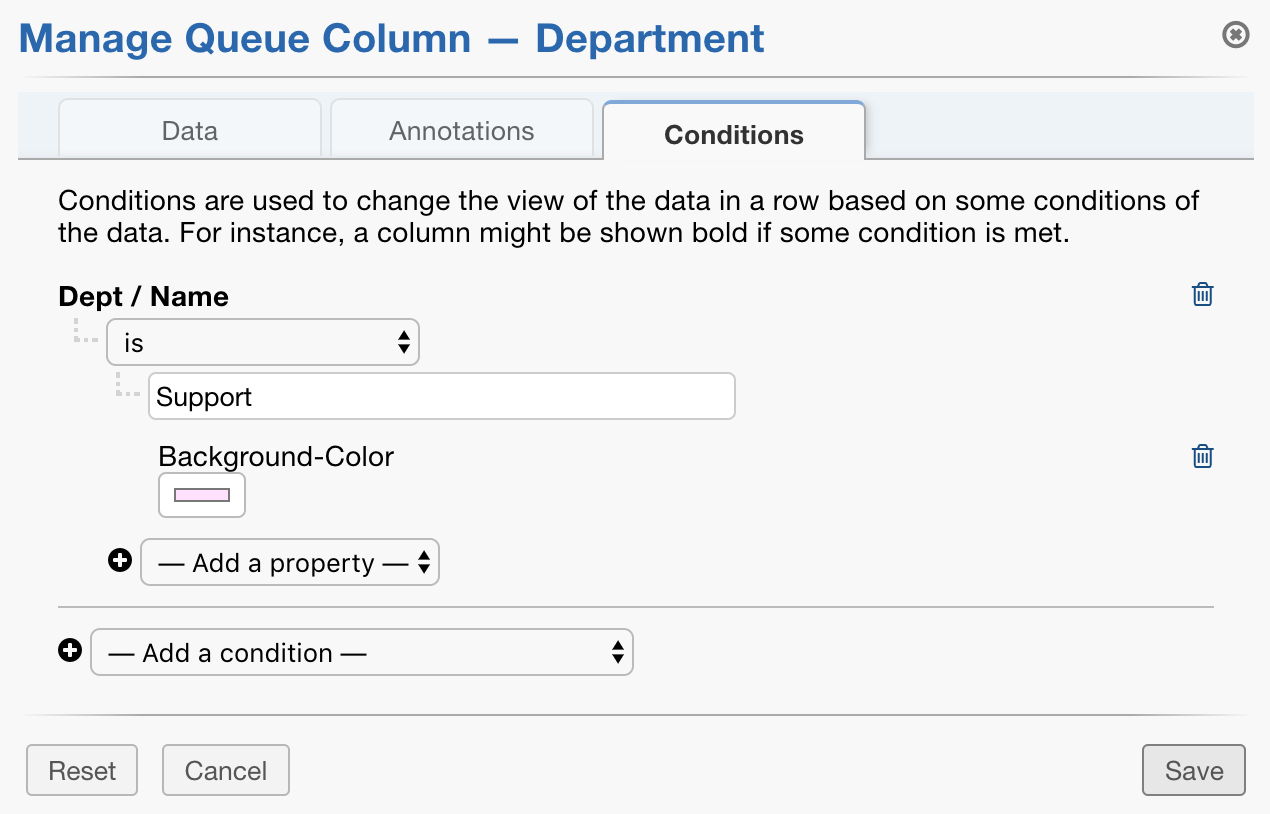
In this example, I have chosen to add a background color to Departments with the name ‘Support’
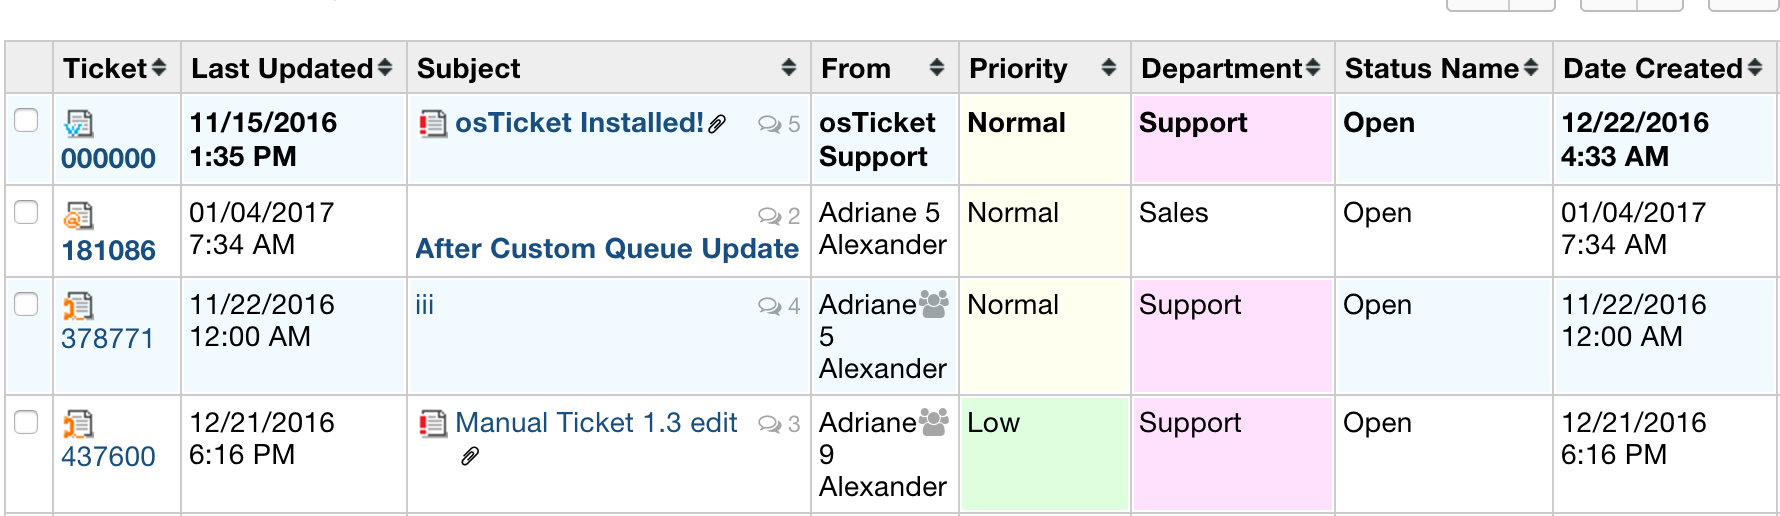
Once saved, tickets where the Department is ‘Support’ will have the style added to only the Department column.
How can I customize how tickets are sorted in queues?
Sorting options can be found by going to: Admin Panel | Settings | Tickets | Queues
From there, you will need to select the queue you want to add column sorting to. In this example, I have selected the Open queue.
There are two ways to control how tickets are sorted, and both options can be found from this menu.
- By enabling column sort which will let you sort by a column that is clicked
Selecting the ‘Columns’ tab lets you specify which columns should be sortable by placing a check in the sortable box.
- Specifying the dropdown sort options. These settings can be found by going to:
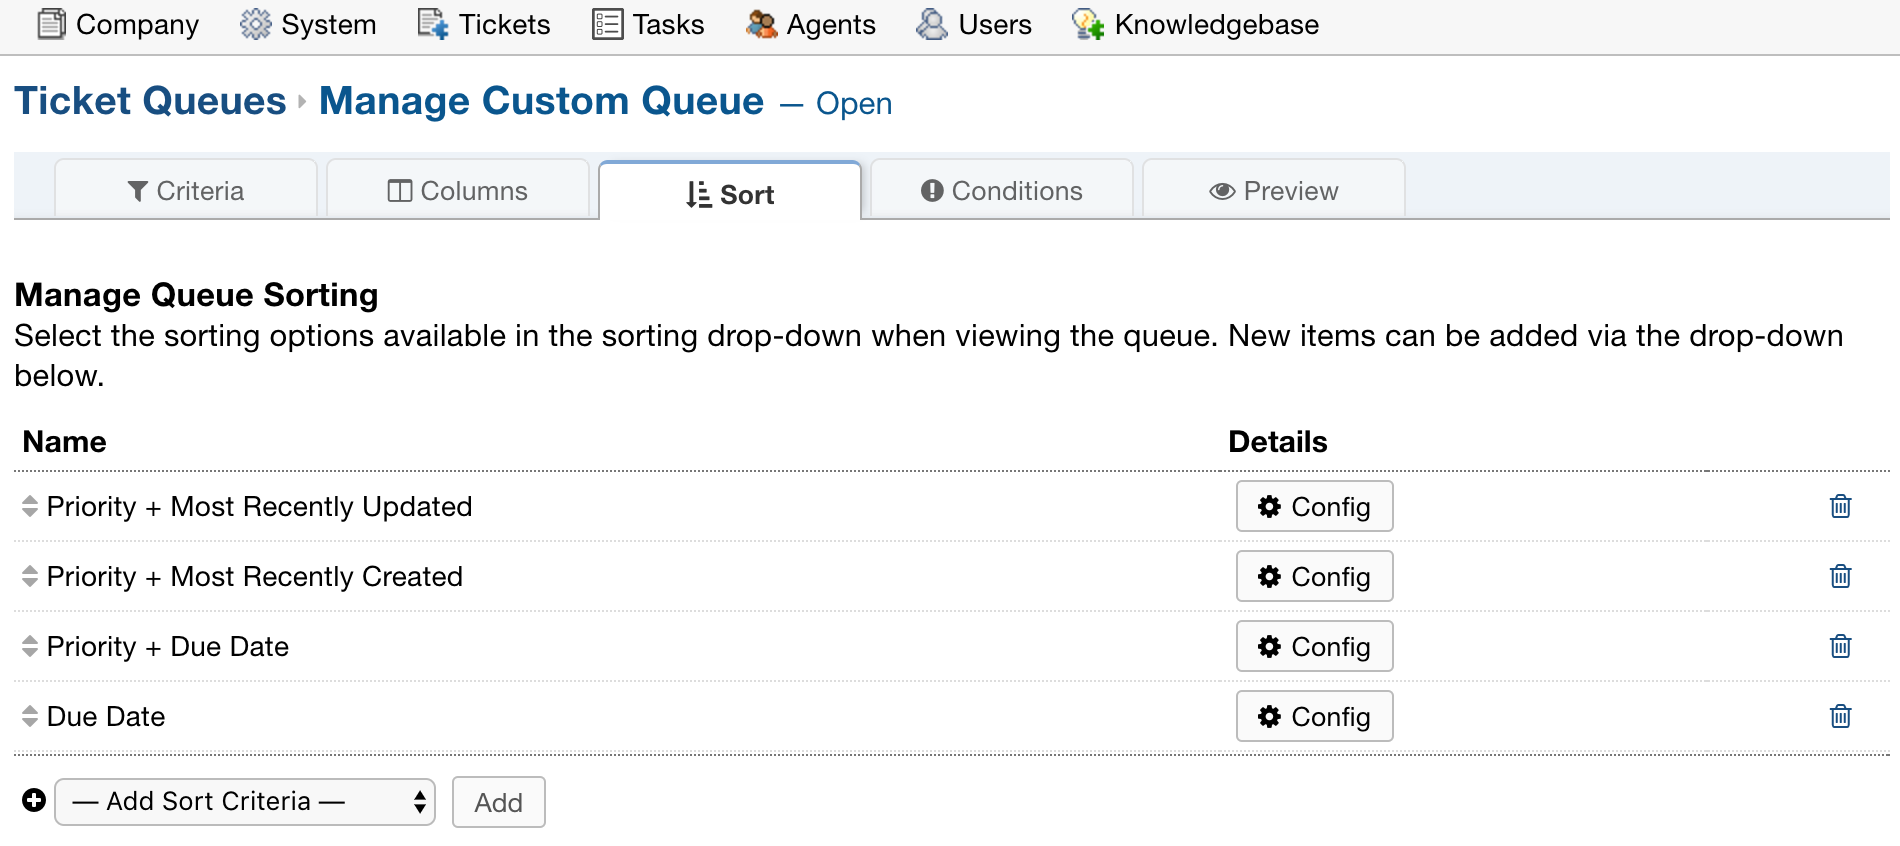
Selecting the ‘Sort’ tab allows you to specify what sort filters you would like to see in the sort dropdown.
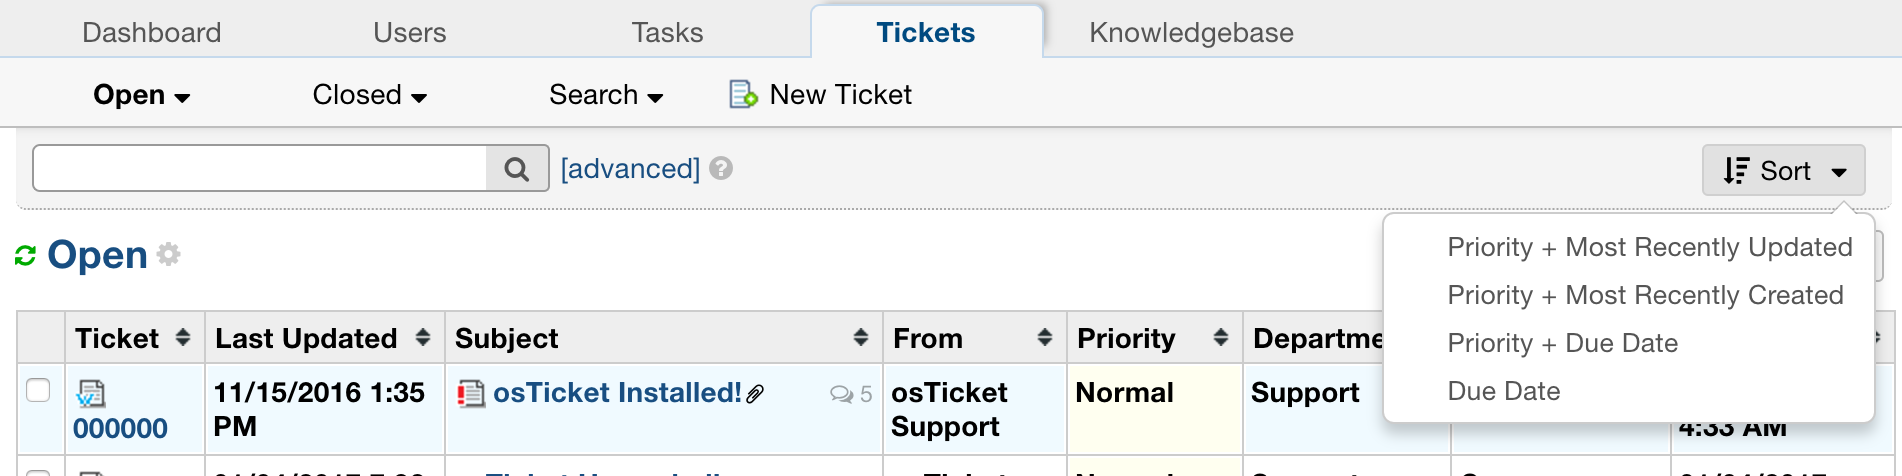
Once saved, you can see your filters by going to tickets and clicking on the Sort dropdown
What is the Parent Queue?
The parent queue is used to determine which column a queue falls under.
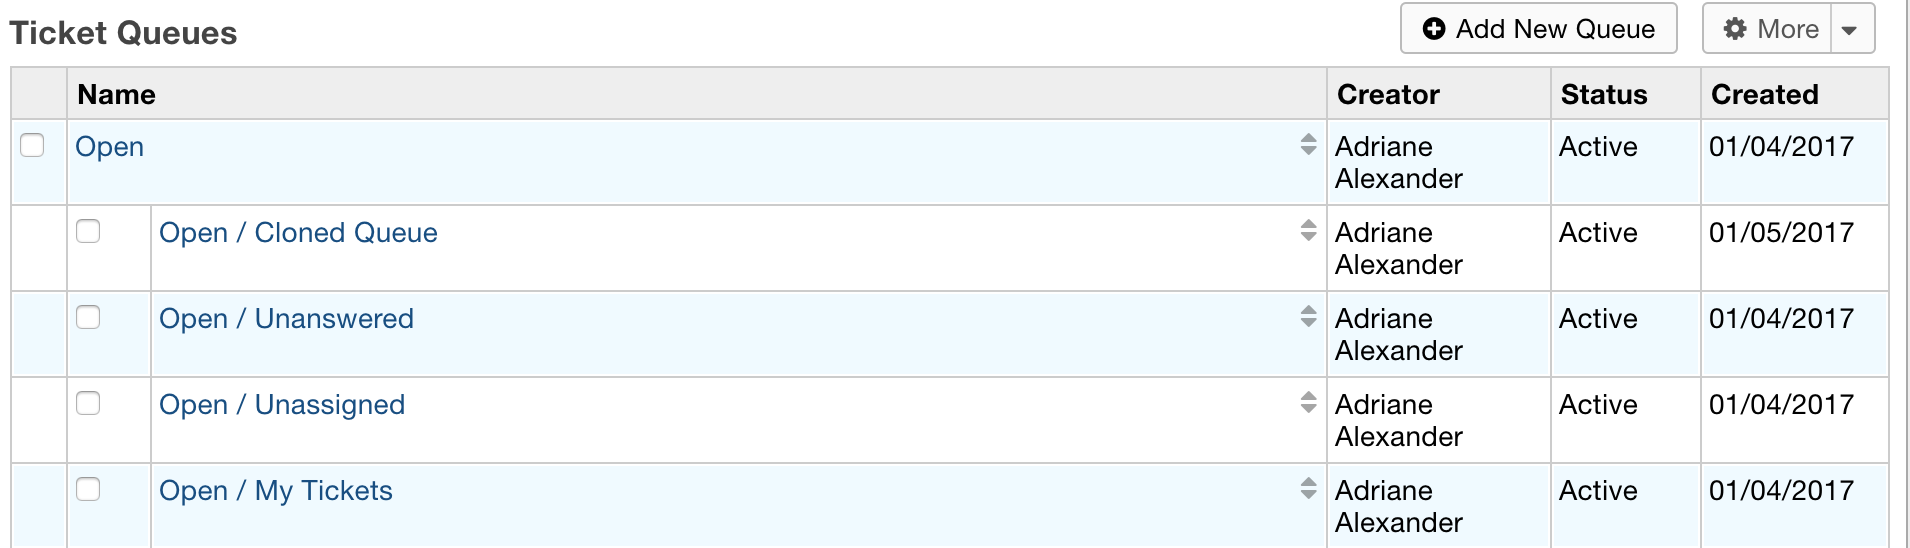
In this example, Cloned Queue, Unanswered, Unassigned, and My Tickets have ‘Open’ as the Parent Queue.
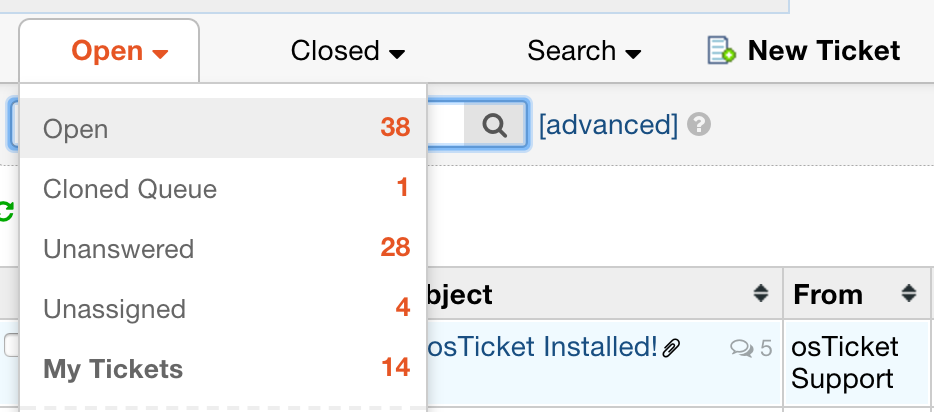
When viewing the ‘Open’ tab, each of these queues are visible.
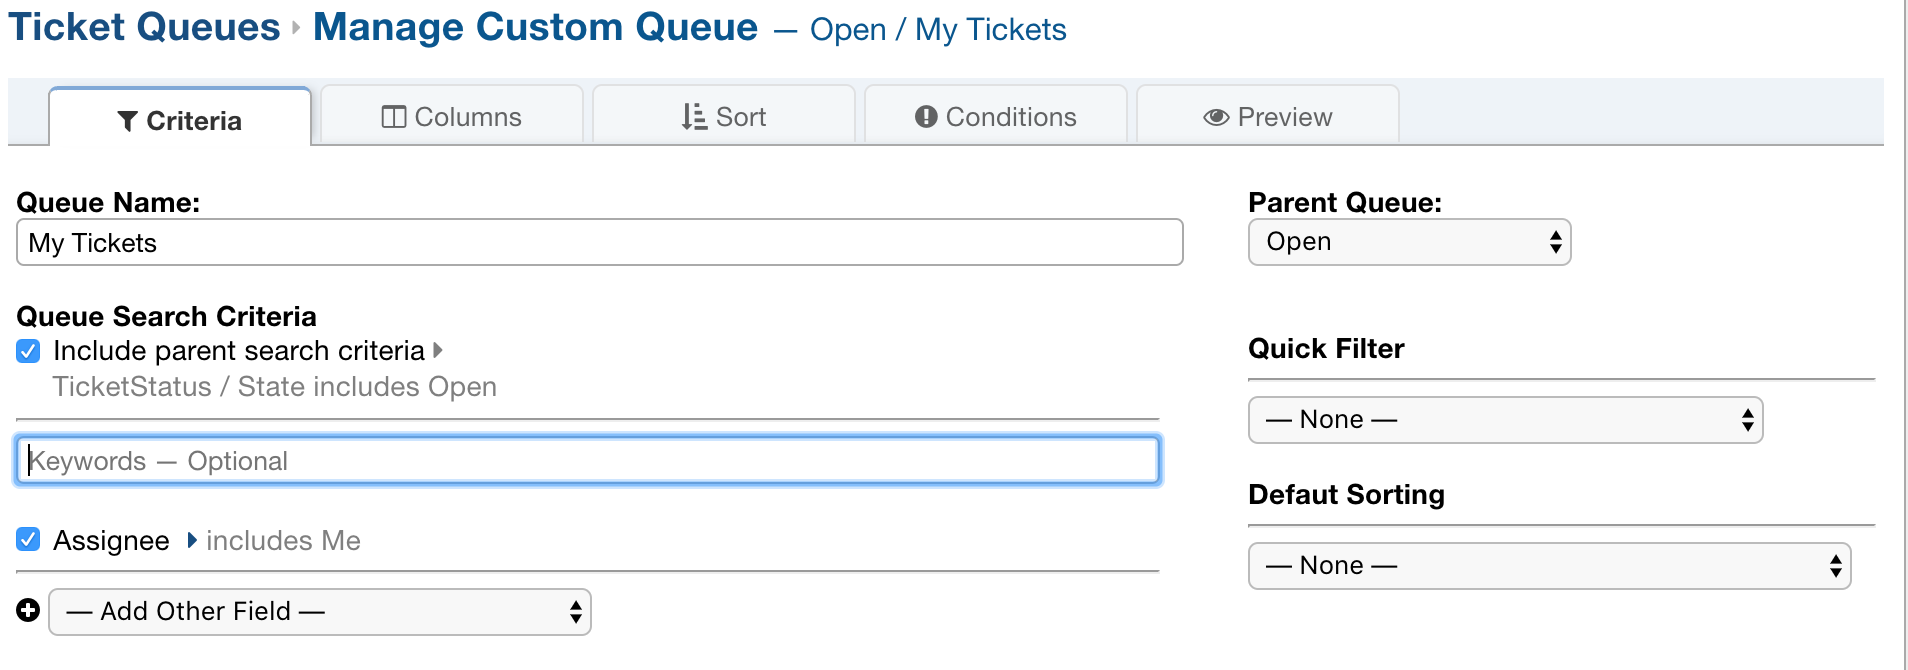
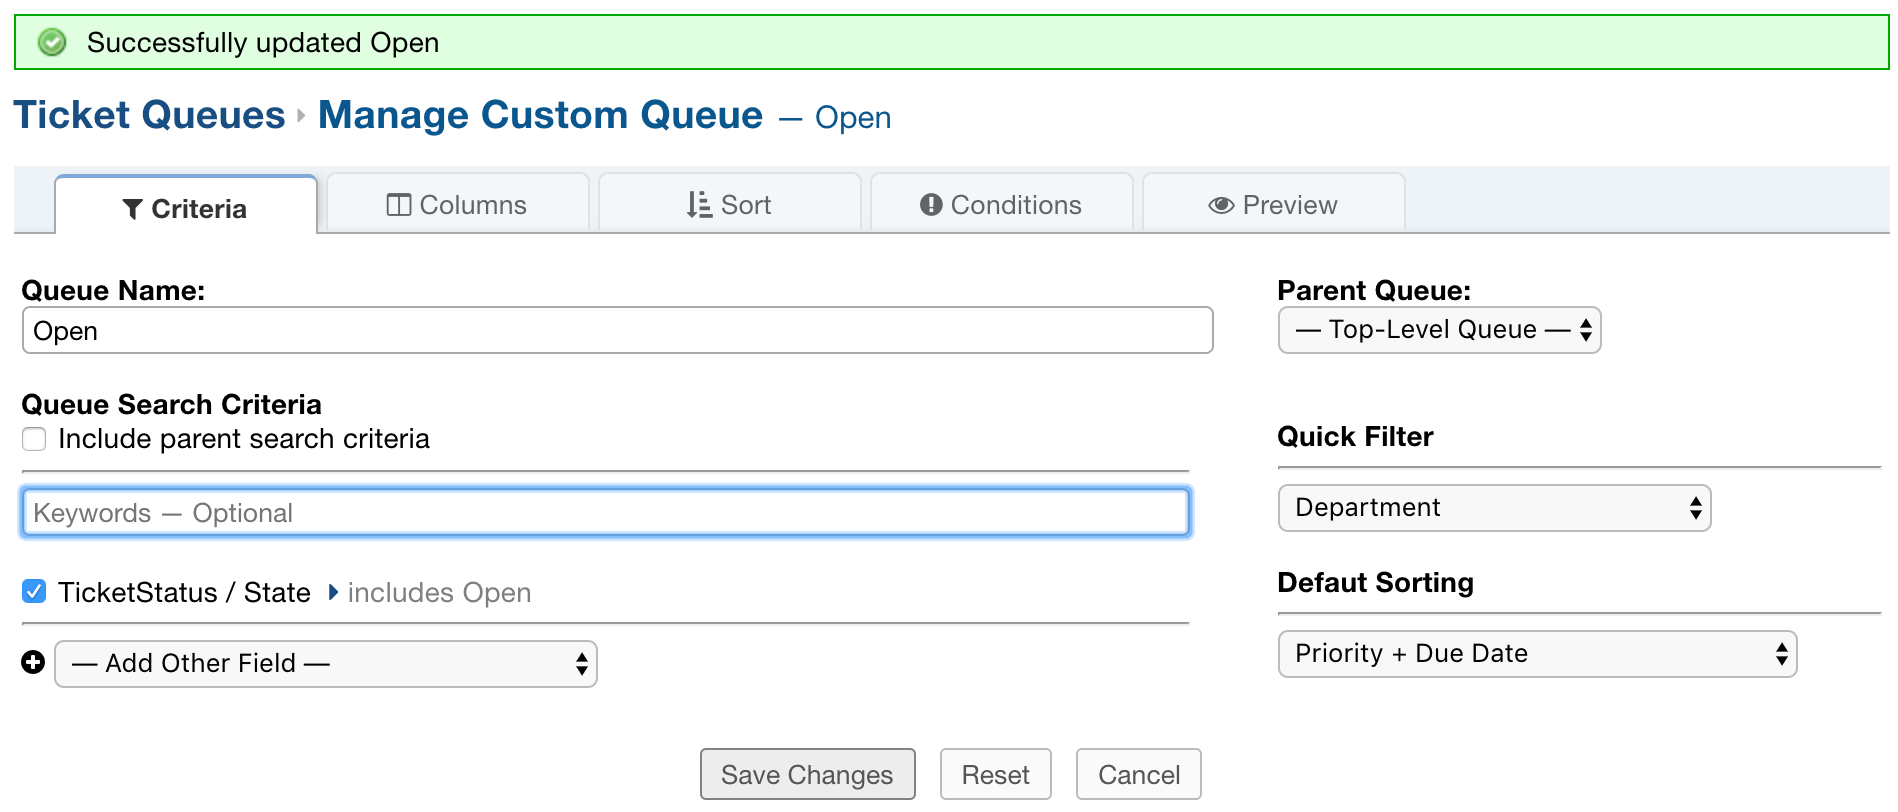
What are Quick Filters?
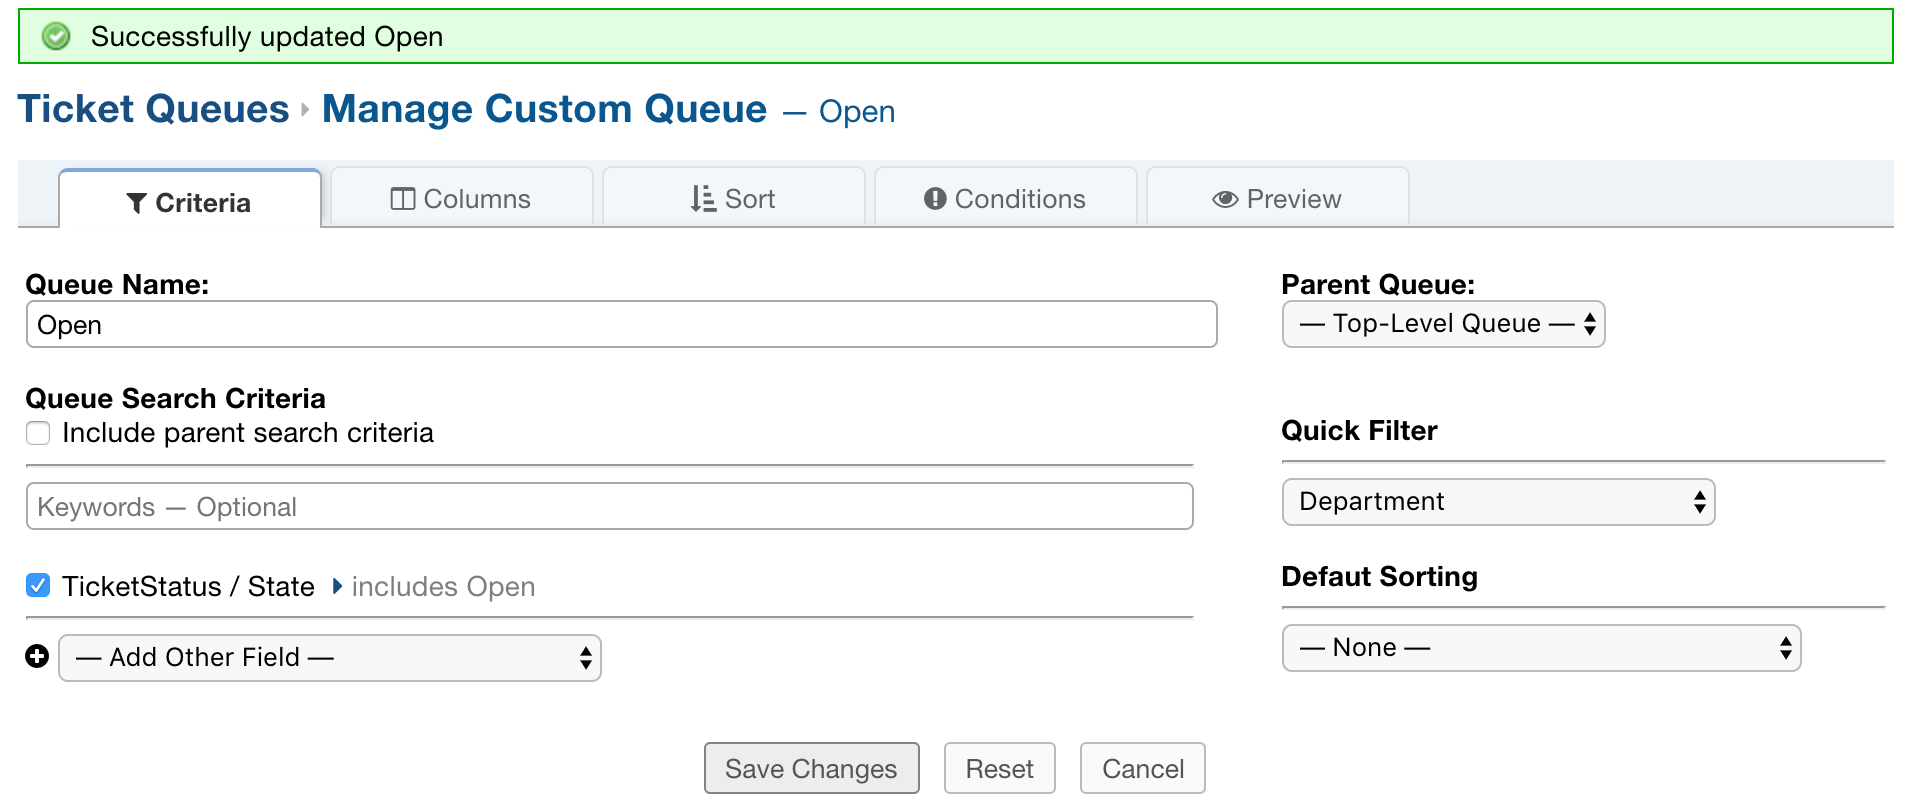
When editing a queue, there is an option to add a Quick Filter. This adds an option at the top of the page to quickly filter by a specified field.
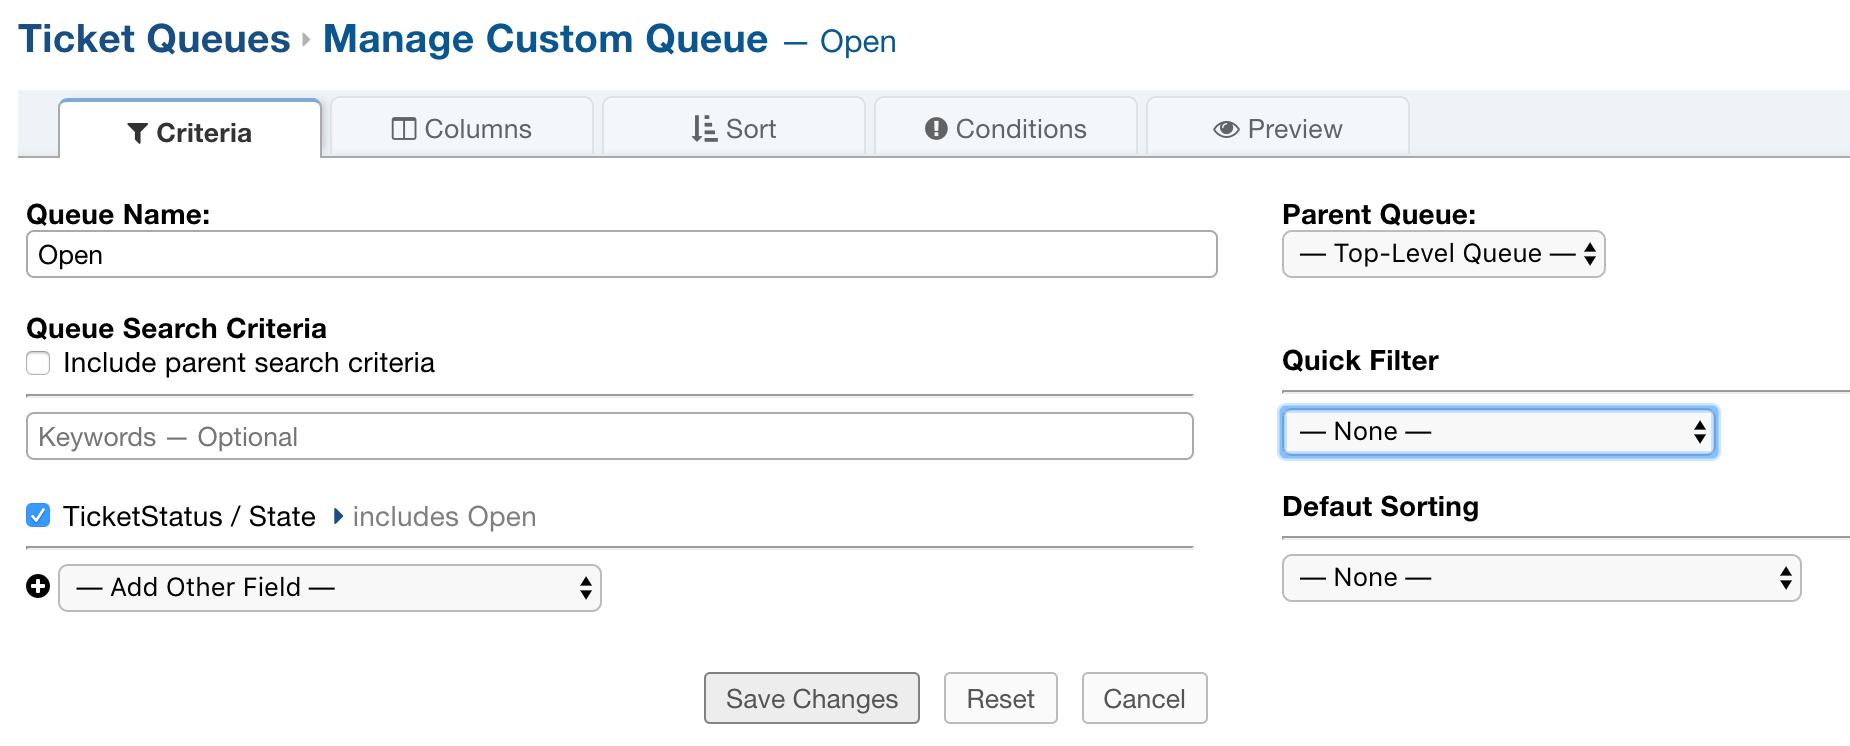
In this example, I will add a quick filter for the Department.
Now, when I view the Open Tickets queue, I can filter tickets by each Department I have access to.
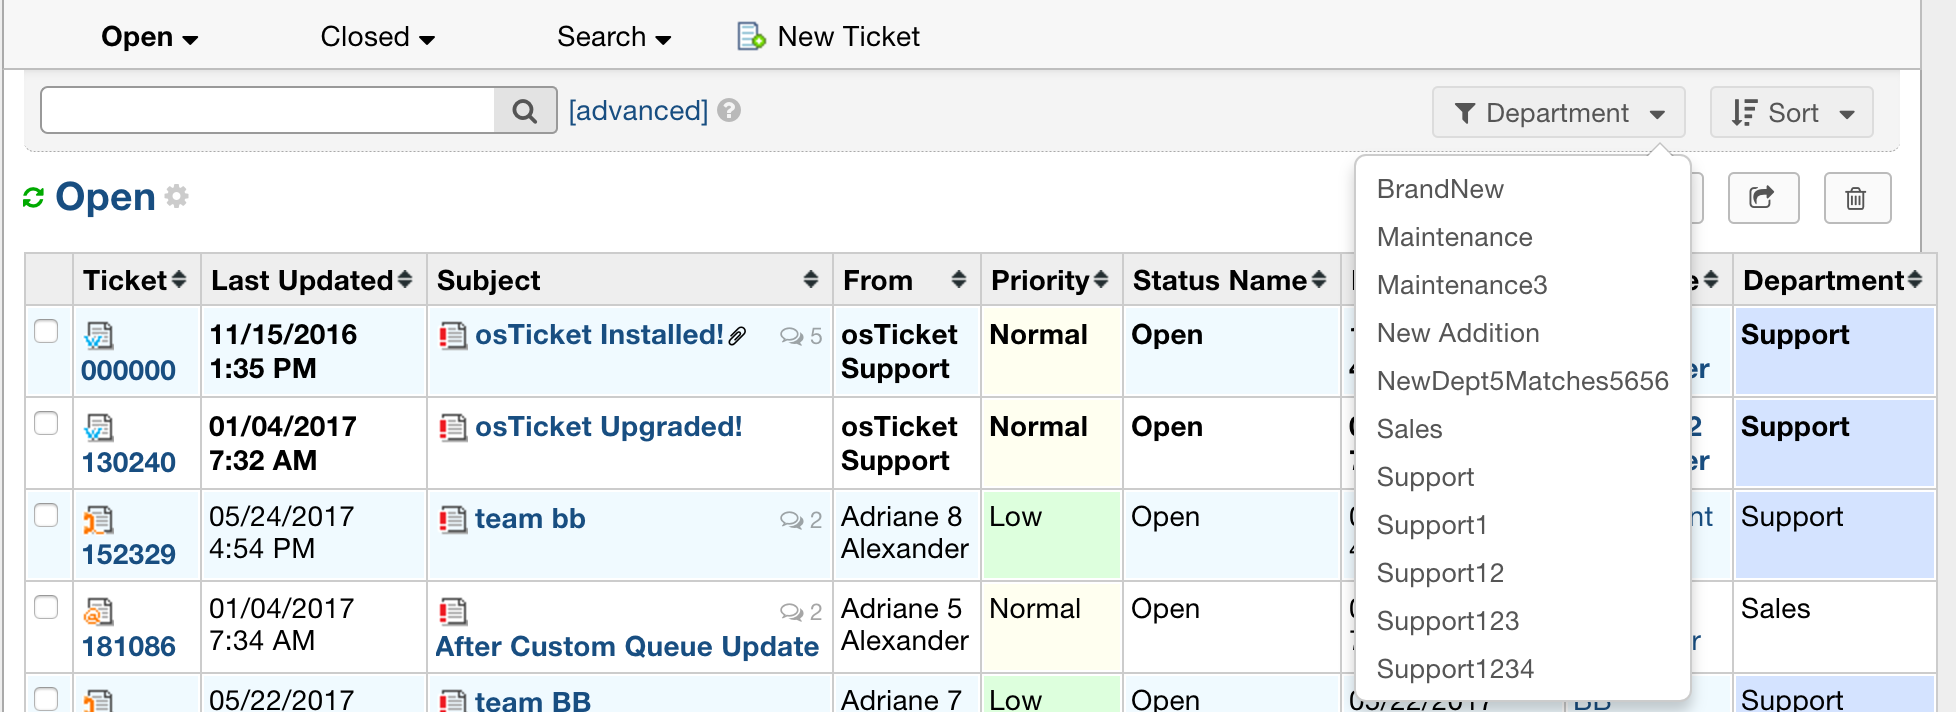
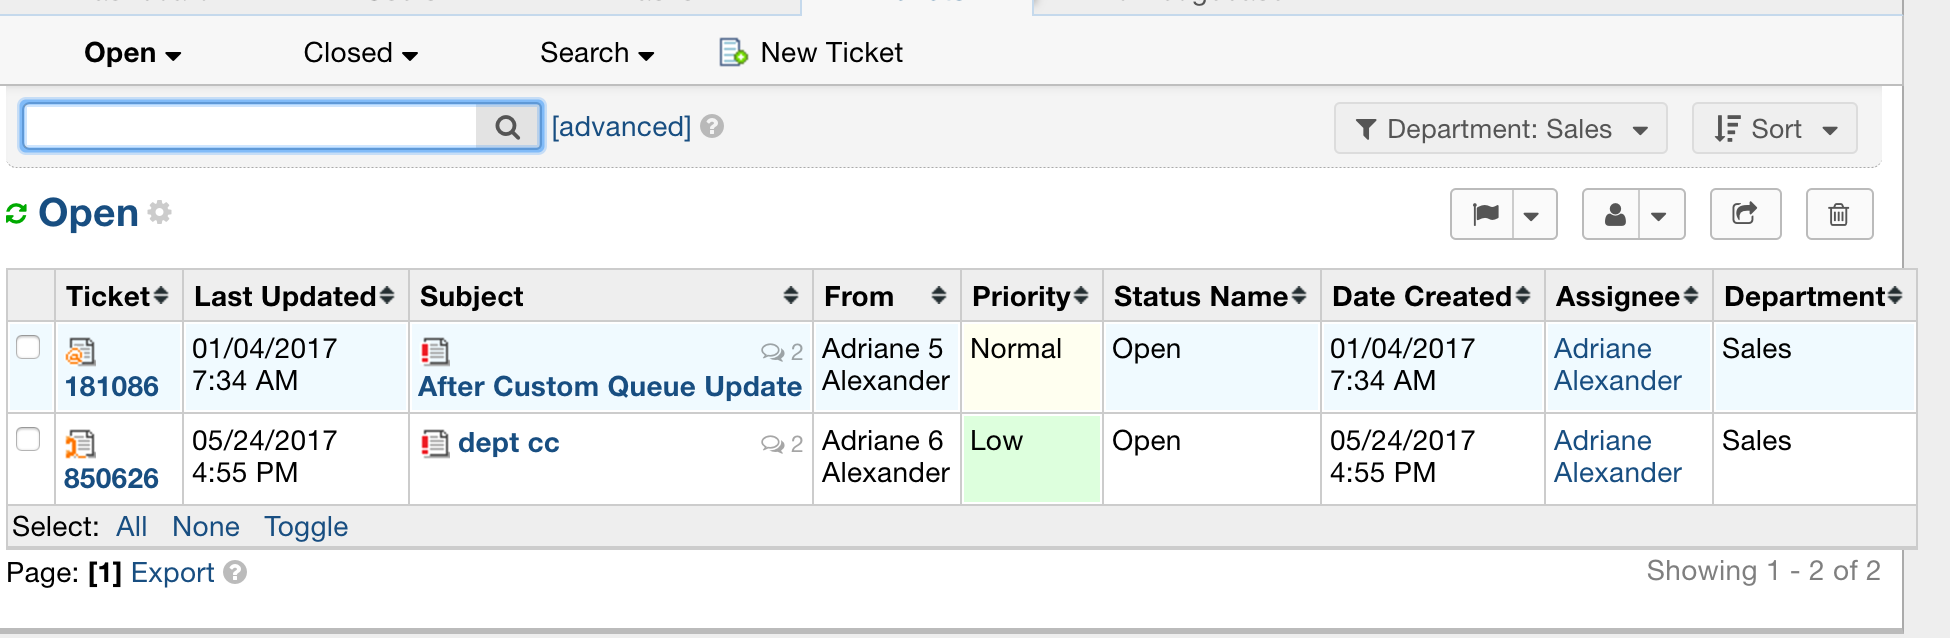
If I click on ‘Sales’, only tickets in that Department will be shown.
What does the Default Sorting option do?
When editing a queue, there is an option to choose the Default Sorting. This automatically chooses which sorting option agents will see by default.
By default, no sort is chosen.

Update sort:
Once changed:
